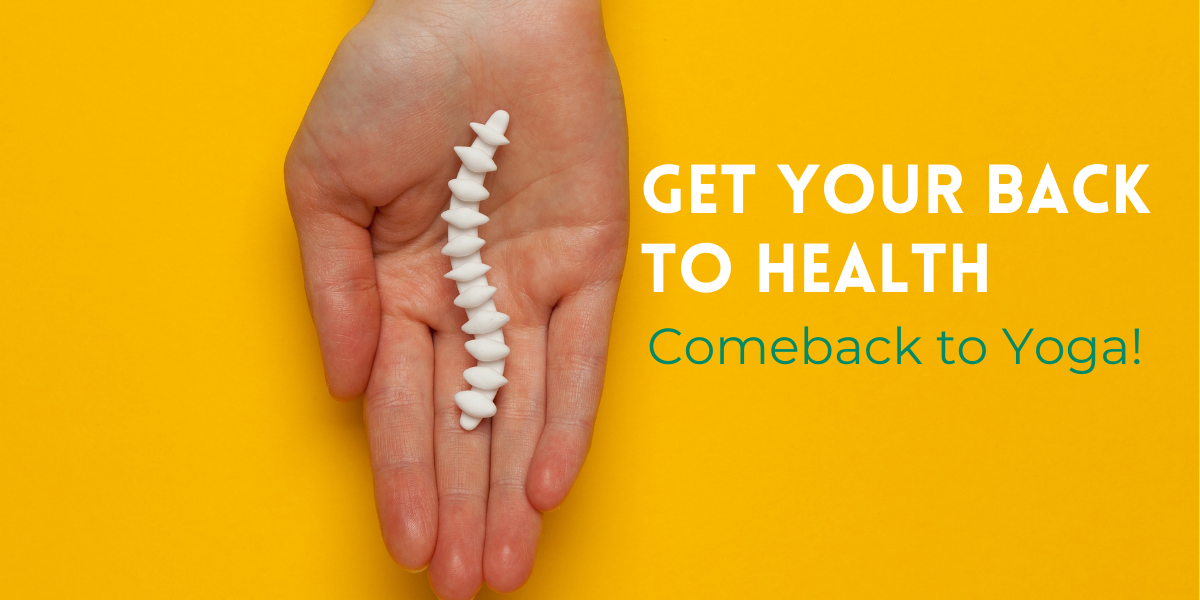
Comeback to Yoga!
GET YOUR BACK TO HEALTH
As promised last time, we will look at mid and upper back strengthening postures in this blog. As the situation these days continues taking a toll on our bodies, being subjected to incorrect postures for long hours and increased use of gadgets, some of the poses described below, will provide instant and long-term relief. A word of caution for those practicing the postures first time – it is advisable to practice under the supervision of a trainer and after consultation with your doctor should you have any underlying condition. Also, keep in mind that any sharp, shooting pain is a sign of pinched nerves – if experiencing such a pain while performing Asana, it is advised that you exit the pose immediately. Your body is the best indicator of the level of comfort achieved in the pose. Be sure to tune your mind to receiving this valuable feedback from your body.
Our spine has 24 moveable vertebrae: 7 small vertebrae in the neck, 12 in the thoracic area, where the ribs attach to the spine, and 5 in the lumbar area. The lumbar vertebrae are the largest and they are meant for stability. They can cause trouble when they are out of alignment, when they are drawn together by tight muscles, or when they are not supported by a strong core and glut muscles. The neck, with the heavy head as its constant weight, suffers equally when it is out of alignment, or when it is squashed by stress and tight muscles.
The middle back, sometimes also called the thoracic back,, is very sturdy because the ribs are attached to the thoracic vertebrae and keep this part of the spine more stable. Causes of middle back pain include poor posture, improper lifting, overuse and injury.
As always with tight muscles, it is important to stretch gently, with the breath. Small movements in which we gently stretch with the exhalation are particularly helpful. The exercises below are not appropriate for pain caused by an injury for which one would need a professional consultation or individualized Yoga therapy.
Let us look in detail at some poses that one could practice addressing Upper and Mid Back Pain:
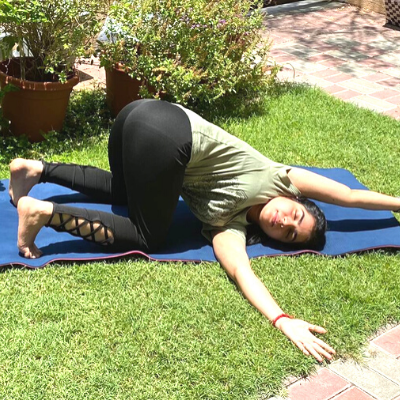
- Urdhva Mukha Pasasana Vinyasa ( Threading the needle pose)
- Start in a tabletop position with your wrists stacked under your shoulders.
- Inhale as you lift your right arm up off the mat and twist it towards the sky.
- Exhale and thread your right arm under your left arm. Bring your right shoulder and temple to rest on the mat.
- Walk your left fingers towards the top of your mat and feel a stretch on the inside of your right shoulder blade.
- Hold for 8 slow breaths, then come back to your tabletop and switch sides.
This pose will relieve tension in rhomboids, shoulders and trapezius. It should bring out some relief around the neck and shoulders.
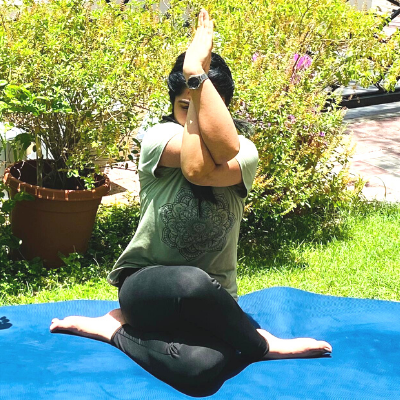
2. Garudasana Seated (Seated Eagle Arms)
- Kneel on your mat with your legs together and your hips resting on your heels. Engage your abs.
- Wrap your right arm under your left, then wrap your forearms to bring your palms to touch. If this isn’t possible, place each hand on the opposite shoulder.
- Lift your elbows up in line with your shoulders and press your forearms forwards. You should feel a stretch through the upper back and shoulders.
- Hold for 8 breaths.
This pose relieves tension around your neck and shoulders, stresses the wrists and elbows. Stiff shoulder problems can be released from this pose.
3. Supta Matsyendrasana (Supine Spinal Twist)
- Lying on your back, bring your arms out to the sides with the palms facing down in a T position. Bend the right knee and place the right foot on the left knee.
- Exhale drop the right knee over to the left side of your body, twisting the spine and low back. Look at the right fingertips.
- Keep the shoulders flat to the floor, close the eyes, and relax into the posture. Let gravity pull the knee down, so you do not have to use any effort in this posture.
- Breathe and hold for 6-10 breaths.
- To release: inhale and roll the hips back to the floor, and exhale the leg back down to the floor.
- Repeat on other side.
This pose relieves tension along the spine, chest and shoulders.

4. Balasana with side stretch
- Start off your Balasana by sitting down on your knees. Keep your feet close together and your big toes touching each other.
- Let your bum rest on the top of your heels. If you are not able to have your bum resting upon your heels, take a pillow or towel and place it in the gap between your back thighs and calves for support. You can choose to keep your legs together or to separate them still having your big toes touching each other.
- Tuck your tailbone in.
- Inhale and as you exhale fold your upper body forward until your forehead touches the floor in front of you. Keep your spine and neck in alignment with the top of your head pointing forward.
- Your arms can either reach forward with your palms facing down or softly rest along your body with your palms facing up.
- Relax your neck and your shoulders. Expand your torso with every inhale and with every exhale, let go of all the tensions in your body.
- When you feel ready, slowly release your arms and roll up vertebra by vertebra until you come to a seated position.
- Walk your hands over towards the right, shoulder-width distance apart keeping your sitting bones stretching back towards the hips.
- Stay there a few breaths, then come back to center and repeat on the other side.

Remember to start the poses with the guidance of an experienced Yoga teacher. Regular and simple practice will liberate you from suffering.
So, get back to your health and not your sofa!
This pose relieves tension along the spine, chest and shoulders.


